You can easily assign your mails to the relevant files. Thus, customer service processes or personnel management, for example, can be accelerated, as you always have the mail correspondence with the respective person at hand, in addition to basic information and important documents.
To sort your mails into files,
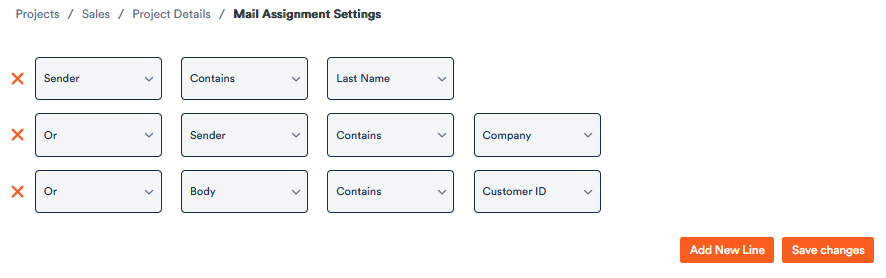
1. Open the Mail Assignment Settings tab in the Project Settings.
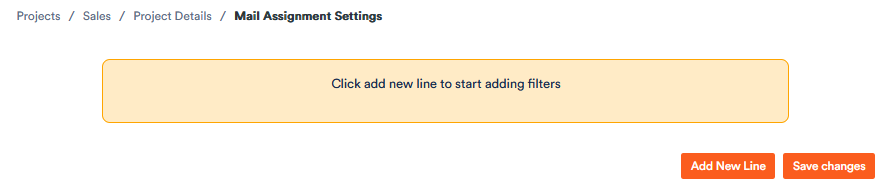
2. Click on Add New Line to create a new assignment rule.
A drop-down menu opens in which you can select the elements on the basis of which a mail is to be sorted to a file.
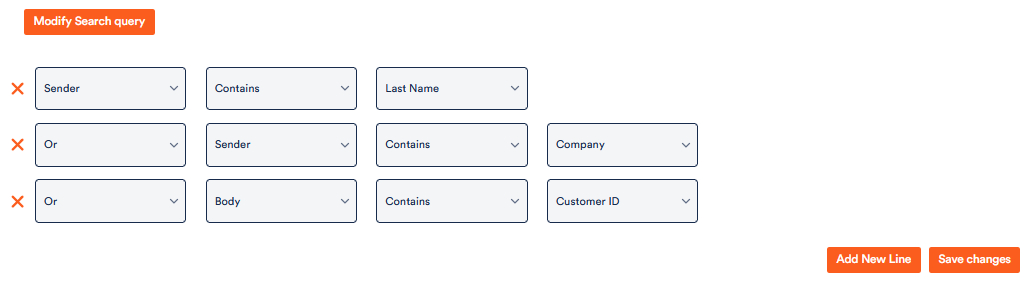
You can create several rules and specify whether they must be fulfilled at the same time (then select “and”) or whether they can be fulfilled individually (then select “or”) for the mail to be assigned automatically.
In the above example, mails that
shall be assigned to the file in which these search elements appear in the corresponding fields.
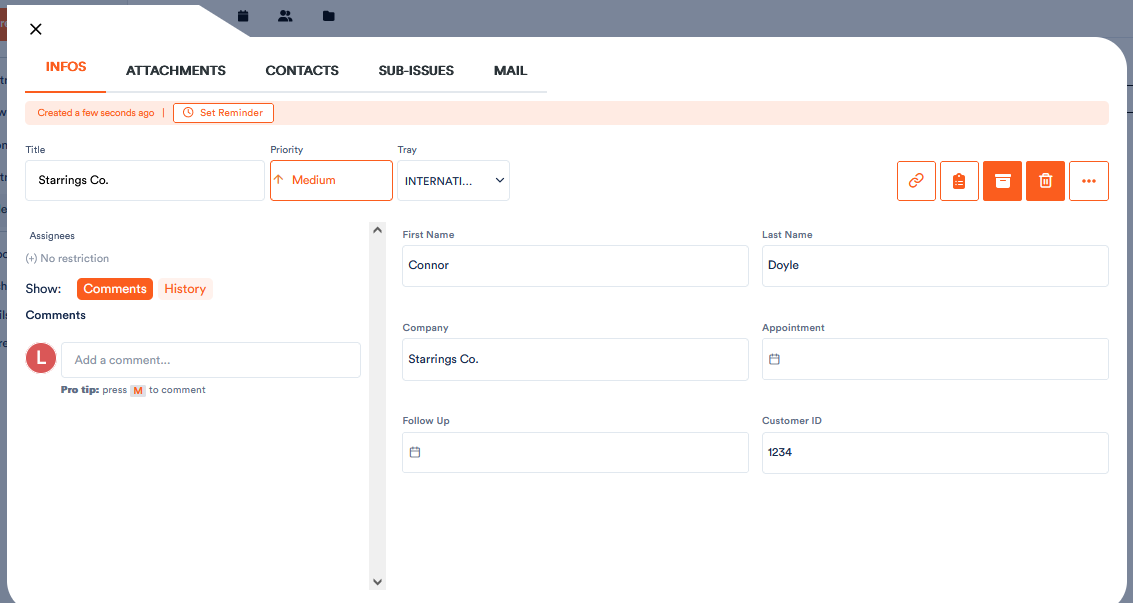
What is meant here are the fields that contain the core information of the record and that you can modify in the project settings under Fields:
For example, if you want to sort mails by a customer ID, make sure you have created a field with the customer ID in the file.
3. When you have created the assignment rules, click Save Changes.
The rules are saved and applied to the entire project. All mails are assigned to the appropriate files. When you open a file, you will find it under the Mail tab.
In the general list view, which has already been introduced, you still have the option of viewing all mails across all files.
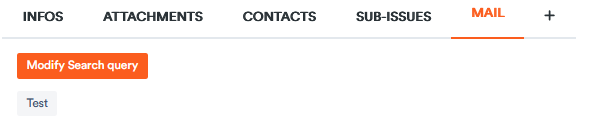
If you want to create a rule that only applies to a certain file, then
4. open this file, click on Mails and then on Modify Search query.
The aforementioned assignment rules are now displayed. By clicking on Add New Line, you again have the option of adding another rule. You can also remove a rule by clicking on the red cross or change the individual fields of the rule lines.
Save your changes and the exception will be applied to the individual file without affecting the general assignment.
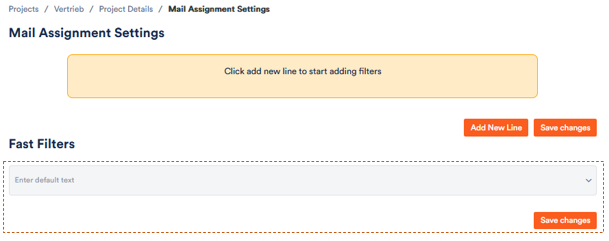
You can also set up fast filters. This is useful if you want to regularly filter the emails in a file according to certain key words, for example “order” or “registration”.
You can find this function directly under the mail assignment settings:
To set up a fast filter,
1. click in the “enter default text” field.
2. enter a term by which you want to filter, in this example we will use “Test”, and save your changes.
When you now open a file and display its mails, the quick filter will appear there.
Once you click on it, only the emails containing the search term will appear.